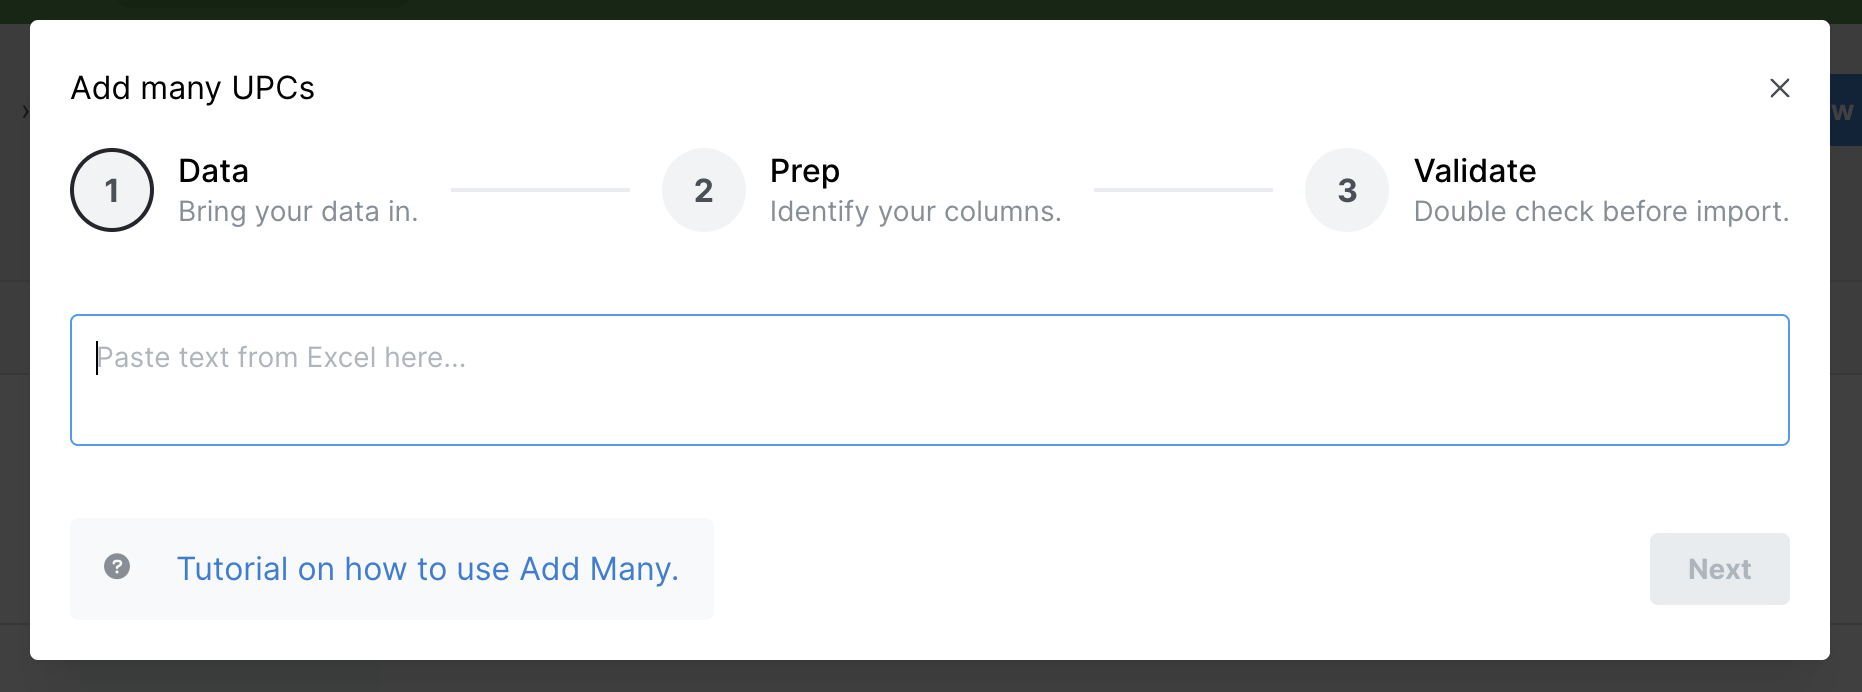
Add many UPCs/brand data
While it's pretty easy to Add a UPC/brand data, sometime you need to add a bunch at once. With the Add many feature you can do just that. It's broken up into 3 steps:
- Data: Copy & paste your data in (ideally from an Excel spreadsheet or some other structured data source).
- Prep: Tell Tagify what the columns from your data are.
- Validate: Make sure your data looks good, then import it all in.
While editing a brand, you can access Add many:
- Change to the Data tab.
- Click New.
- Then click Add many...
Data
The first step is to get your data in. The best method is just by copying data straight from an Excel spreadsheet and pasting it right in. For example, here's my sheet:
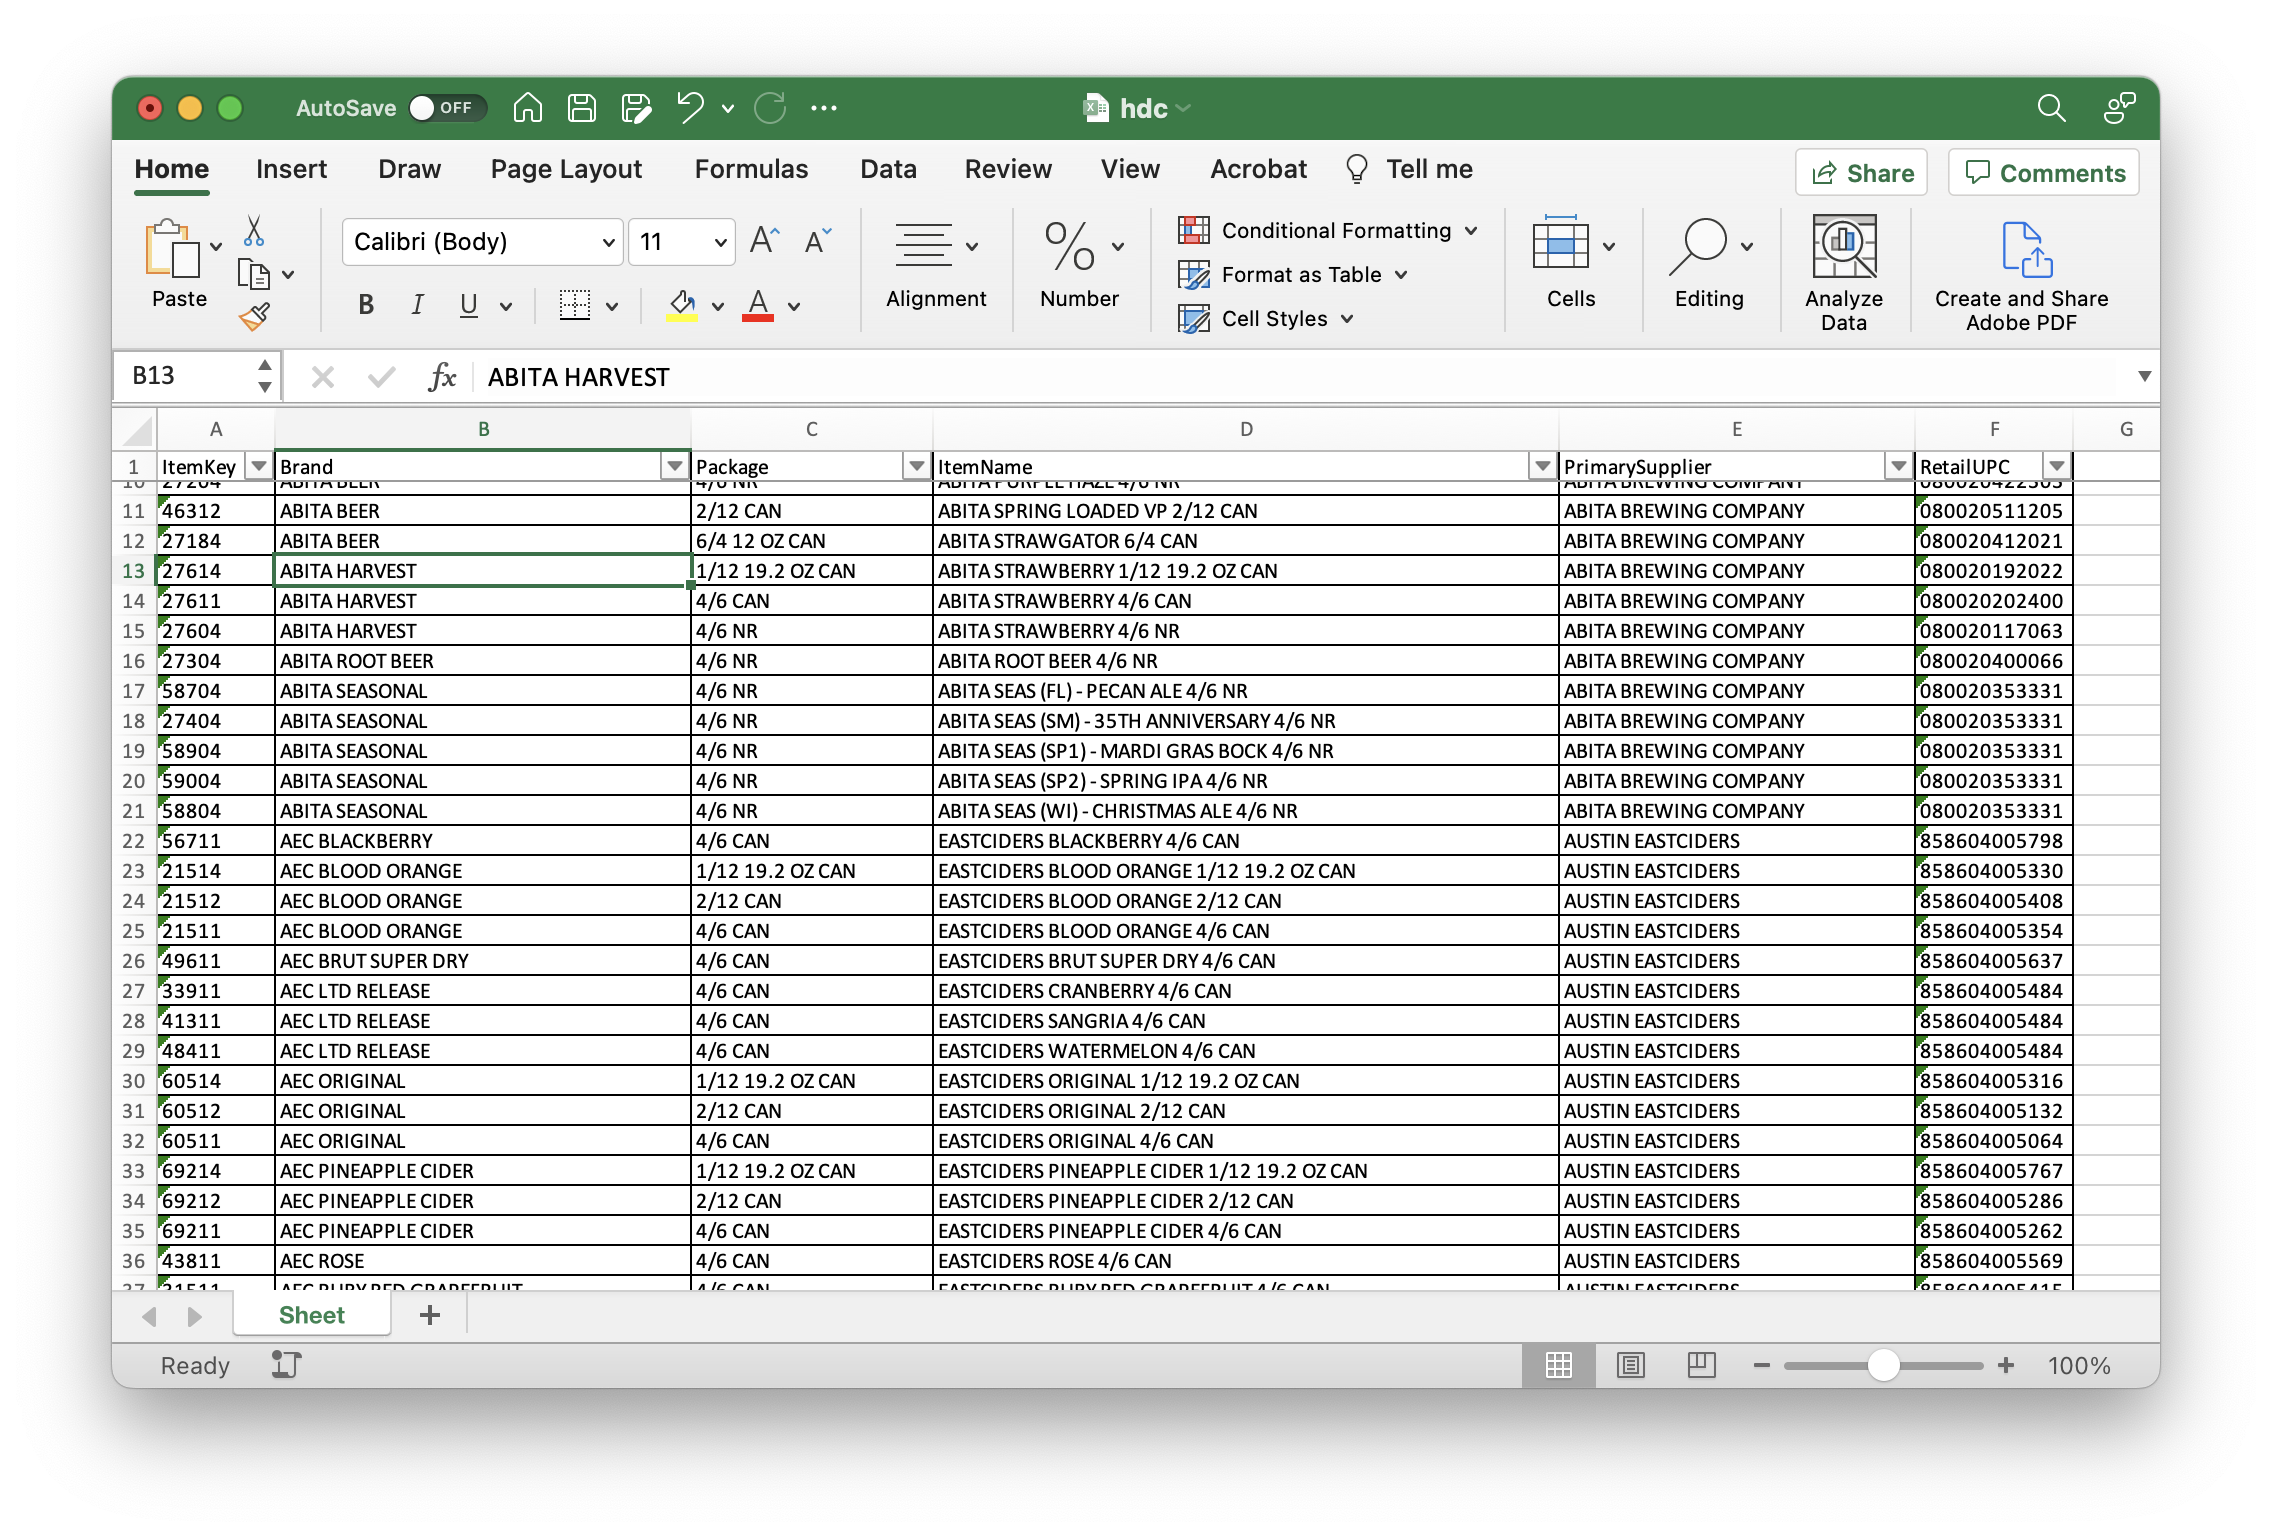
And let's say I wanted to grab my item key, package, item name and retail UPC. You can just copy the data you need and paste it right in:
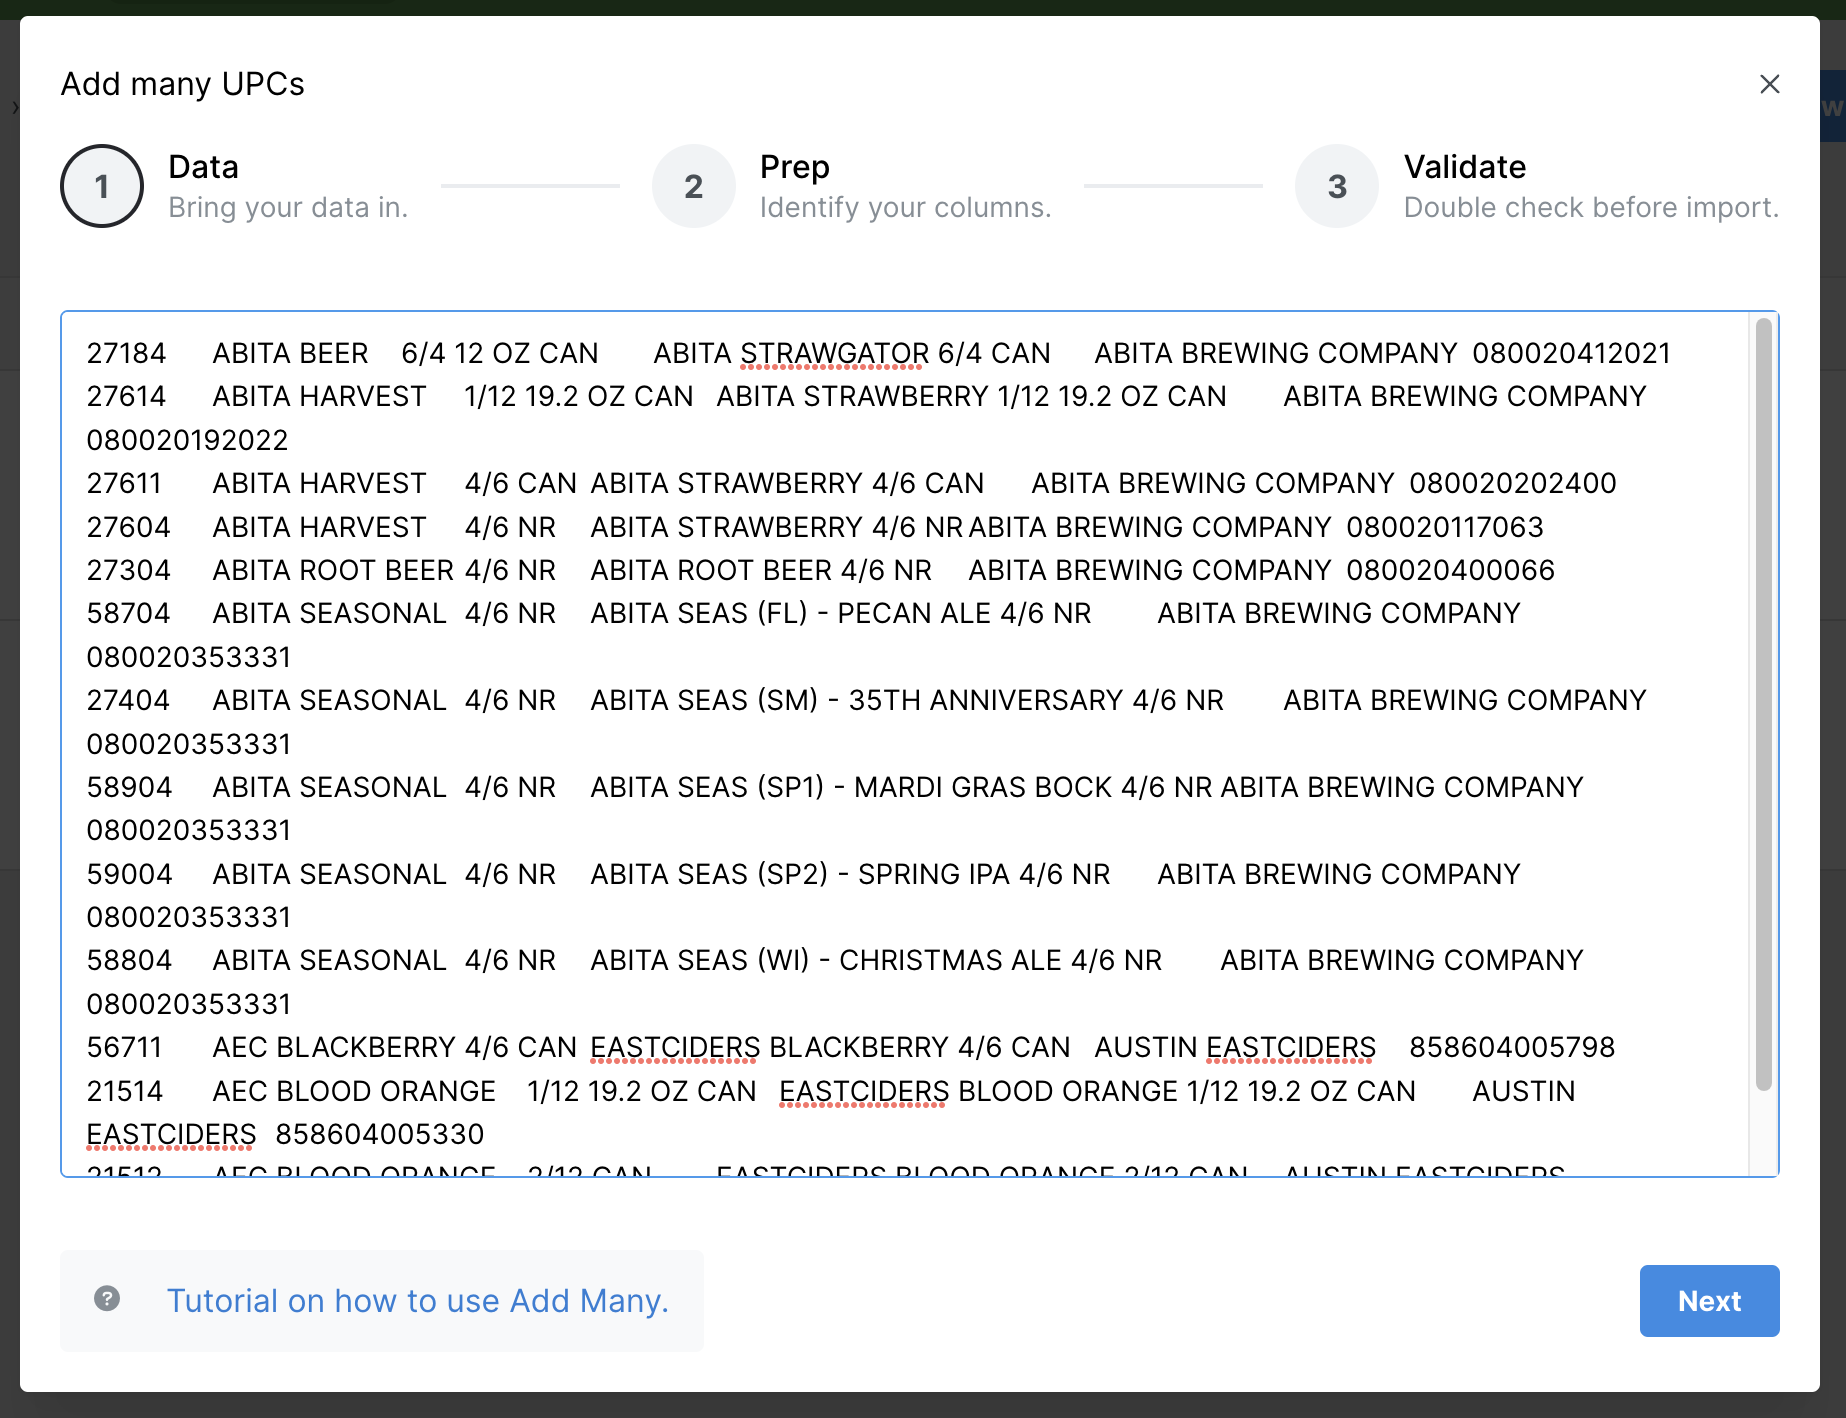
What a mess! No worries, let's click next to make some sense of this.
Prep
Now we want to tell Tagify what data to look for under each column. Using the example above, here's how I've got mine selected:
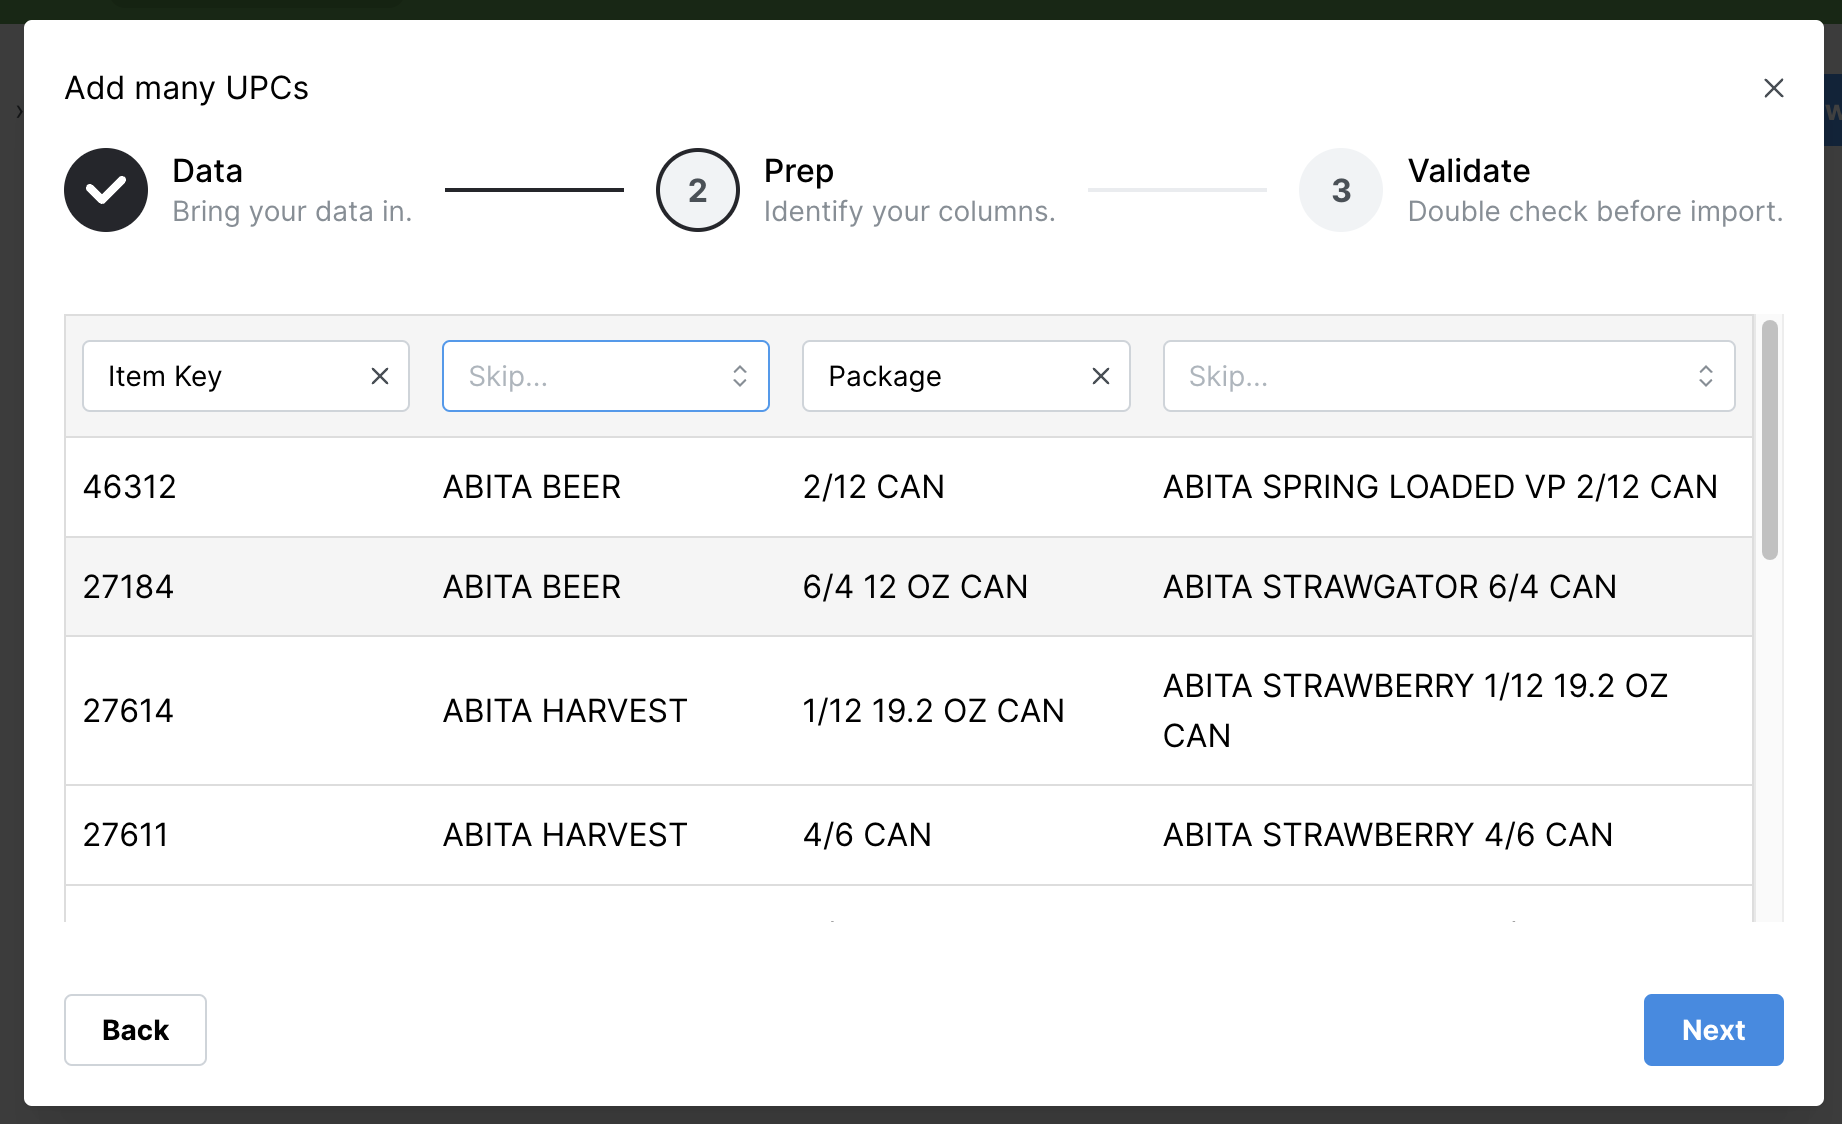
Looking at my data, my first column is my item key. So I used the top dropdown there to tell Tagify that the first column was indeed an Item Key. And so on. The only requirement here is a package column. If you don't want to use a column, just don't select anything for it and Tagify will skip it.
Tagify considers your item keys (or item #'s) unique. So if it sees that you've already got a brand data setup with your incoming item key, it will update the existing data. If it doesn't see your incoming item key, it will create your new brand data.
Here's the data that Tagify can read in from your sheet:
- Brand: In case you wanted to use your sheet to add data to other brands, you can use this column to tell Tagify which brand to use for your row of data. The brand coming in will have to match a brand you currently have set up in Tagify. You can also use a brand alias here.
- Package: The package type that you want to assign this data to. You can also use a package alias here as well.
- Item Key: An item key/item number/product key, etc.
- Item Description: Some tag styles can use an items description.
- UPC: Your retail UPC.
If everything looks good, hit Next.
Validate
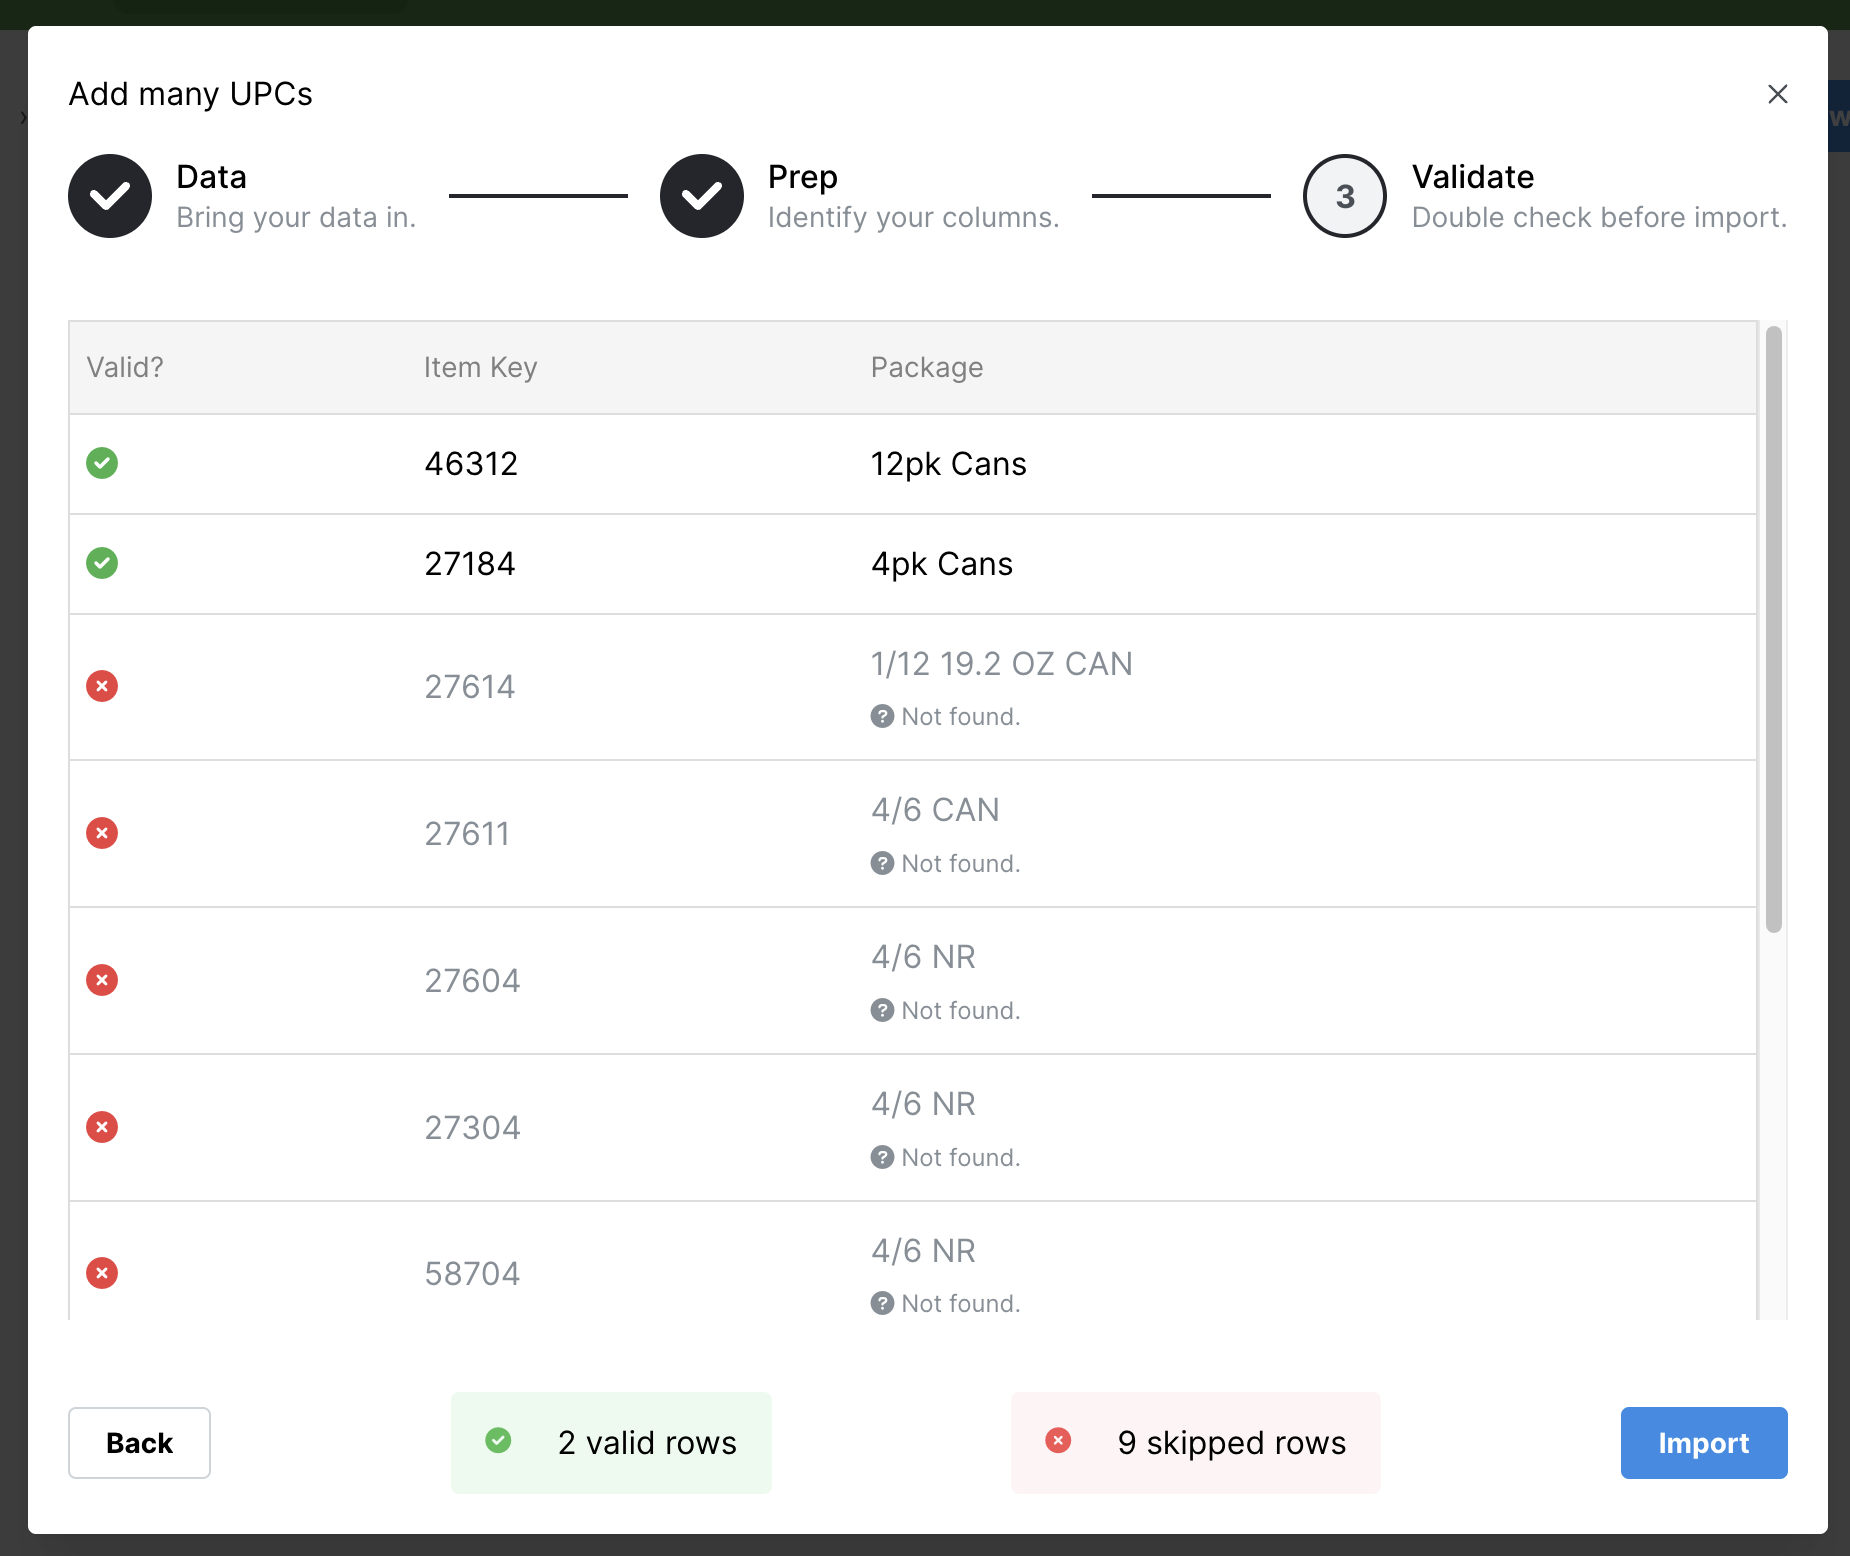
Tagify went through my data and tried to match up everything it could. But hold on, how did it know that "6/4 12 OZ CAN" was actually my "4pk Cans"? Check out the magic of Package aliases for more!
Now just hit Import and any valid row will be imported in. Pretty nice!