Syncing pricing from your RAS
There are a ton of ways to get pricing into Tagify:
- Using the world class iOS app and website directly
- Import/Export via Excel
- Easy UPCs & retails
But what if your team is already punching in pricing for their customers in your route accounting system (RAS)? Wouldn't it be much easier to just use that already existing data and sync it into Tagify?
Tagify can take data from your RAS and automatically create/sync tag projects to be used by your people.
This allows you to not double work your folks and still use the raw power of Tagify when it comes to your signage.
Overview
- You'll setup a scheduled report (that will include a spreadsheet attachment or a link to a spreadsheet) in your RAS that emails your data directly to Tagify.
- Tagify will process your incoming data, line by line:
- It will use the incoming item # (or your item description via aliases) to see which brand/package to create a price for.
- It will use the incoming customer data to know which customer to assign to each new project.
- It will use the incoming sales route to know which user the project belongs to.
- After the projects are created/updated, your people will use the tag projects like normal. If they update pricing in the RAS, the projects will be updated whenever you import that new data in.
Data prep
Brand data
As mentioned above, Tagify reads your incoming item descriptions or your item #'s to know what brand/package needs to be created for each price.
For item descriptions, you can teach Tagify how to read them by adding Brand aliases and Package aliases. Using item descriptions is recommended as Tagify will automatically update your brand data for you.
For item #'s, check out UPCs & brand data for an overview and Add a UPC/brand data to start adding them manually. You can also Add many UPCs to add a bunch at once.
If you're not sure how to get your brand data in or would just rather someone else do it, reach out:
User routes
After you get your brand data setup, we need to tell Tagify who-is-on-what sales route. Remember that your customers are assigned to a sales route which you can in turn assign to your users. You can even put multiple sales routes on your users so they can access more projects.
You can update an individual user by checking out the Extras tab and using the Route(s) setting while editing a user. You can also do Mass changes to users as well.
Your RAS
Now that we've got your data setup in Tagify, it's time to get your RAS to start sending data.
What kind of data is Tagify looking for?
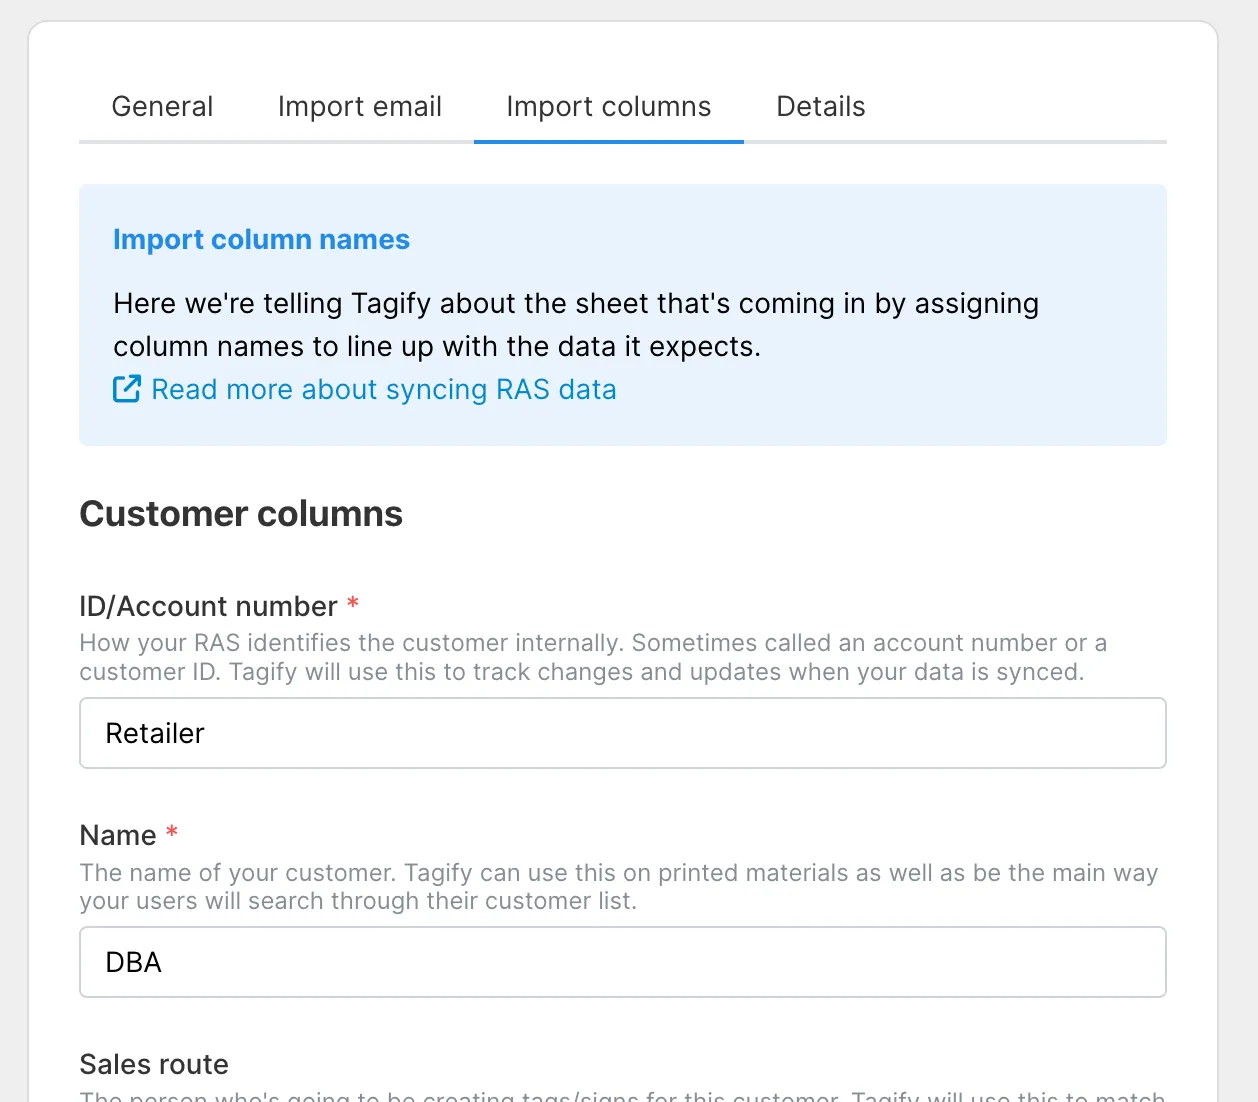
First, let's head over to your RAS company settings. You can ignore most of that stuff for now but let's click on the Import columns tab. This is where you're telling Tagify about your incoming spreadsheet/data:

All we're doing is lining up column names from your sheet to what Tagify expects. For instance, Tagify is looking for a Customer ID. In your sheet, what's the name of the column with that data? "Acct#"? "CUST ID"? Ect.
The most important columns are:
- Customer ID
- Customer Name
- Sales route
- Item Key
- Item Retail
The other columns are nice to have but not required. Here's a sample CSV file that shows what Tagify can use:

So if we were using the sample above as our incoming data, we'd update the columns in Import column data to match the data that Tagify was looking for.
Get data out of your RAS
For Tagify to use your data it's going to have to come out of your RAS (no pun intended). Which particular brand of RAS you use is going to determine the settings in your RAS company settings but the gist is the same. You'll need to setup a scheduled (ideally nightly) report that emails Tagify the data you'd like to bring in.
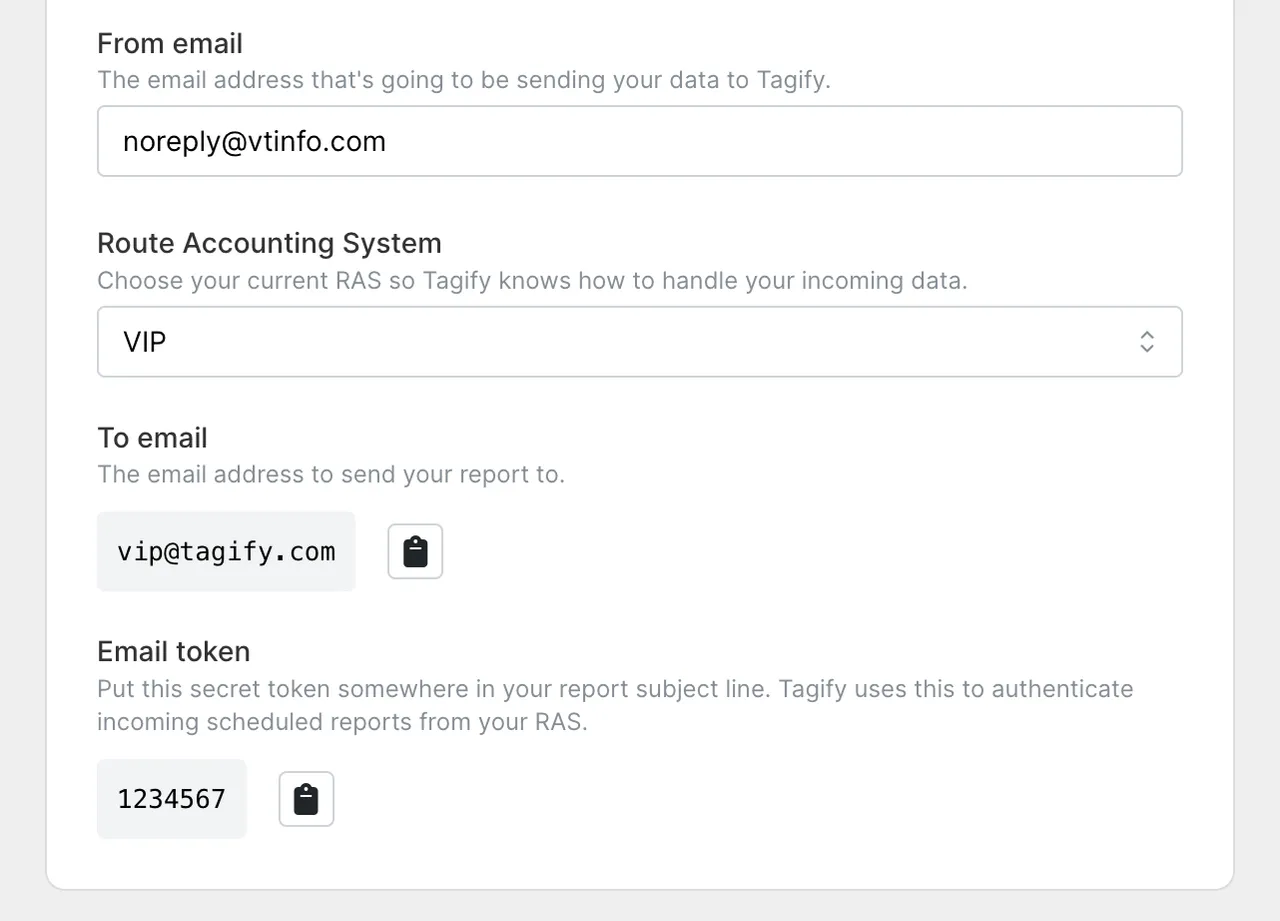
Once you've got your report setup you can tell Tagify how it's coming in your RAS company settings. So if you're using VIP:

Here you'll see I'm telling Tagify where the email is coming from: noreply@vtinfo.com. This section also tells you what email address to to email (vip@tagify.com) and what special token to include in the subject line of your report email (ex: 1234567).
This info will change depending on what RAS you're using. Reach out to support@tagify.com if you're not sure.
Finishing up
You've made it on this long data journey. What now? Enjoy the fruits of your labor:
- Now that your teams pricing is automatically synced in, they can start Importing projects right onto their iOS device to make updates or use as a starting project.
- Now that you're also importing your customers, you can use Metrics to easily track their cost and usage.
- Since you've got your sales routes setup, sharing projects is super easy as anyone using the same route can access other projects. For instance, you can assign a field supervisor multiple sales routes and they'll have access to all of those projects tied to those routes. Check out Importing projects to see how.
- You can also have Tagify sync in your product UPCs, simply checkmark Sync UPCs in your RAS company settings.