Project settings
Getting to your project settings
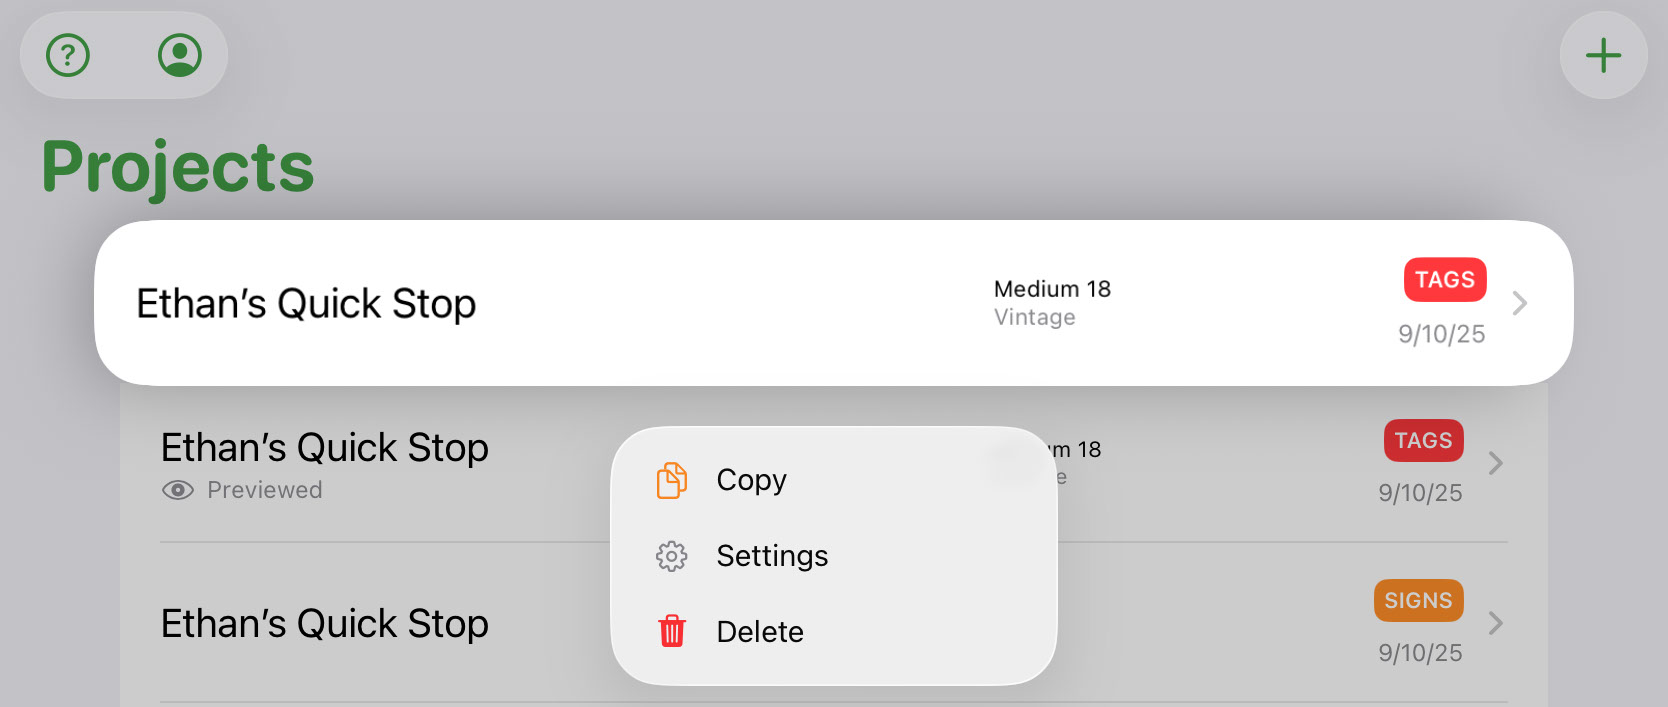
When you create a new project to give it a name, that's technically your project settings. But sometimes you need to get back there to make changes. Couple ways:
While in your project list, tap & hold or swipe left on your project to tap Settings:
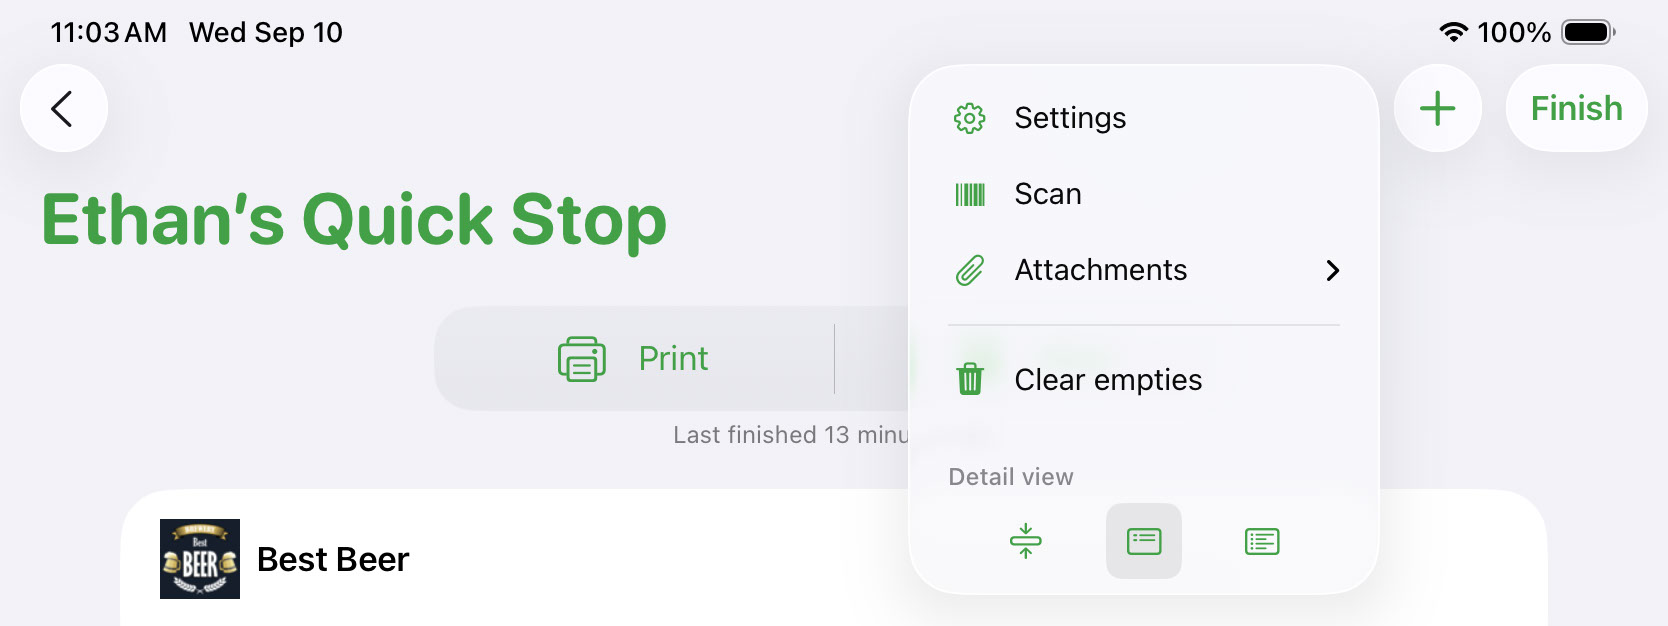
Or if you're editing your project, you can hit Dots in the top right, then Settings:
Tag project settings
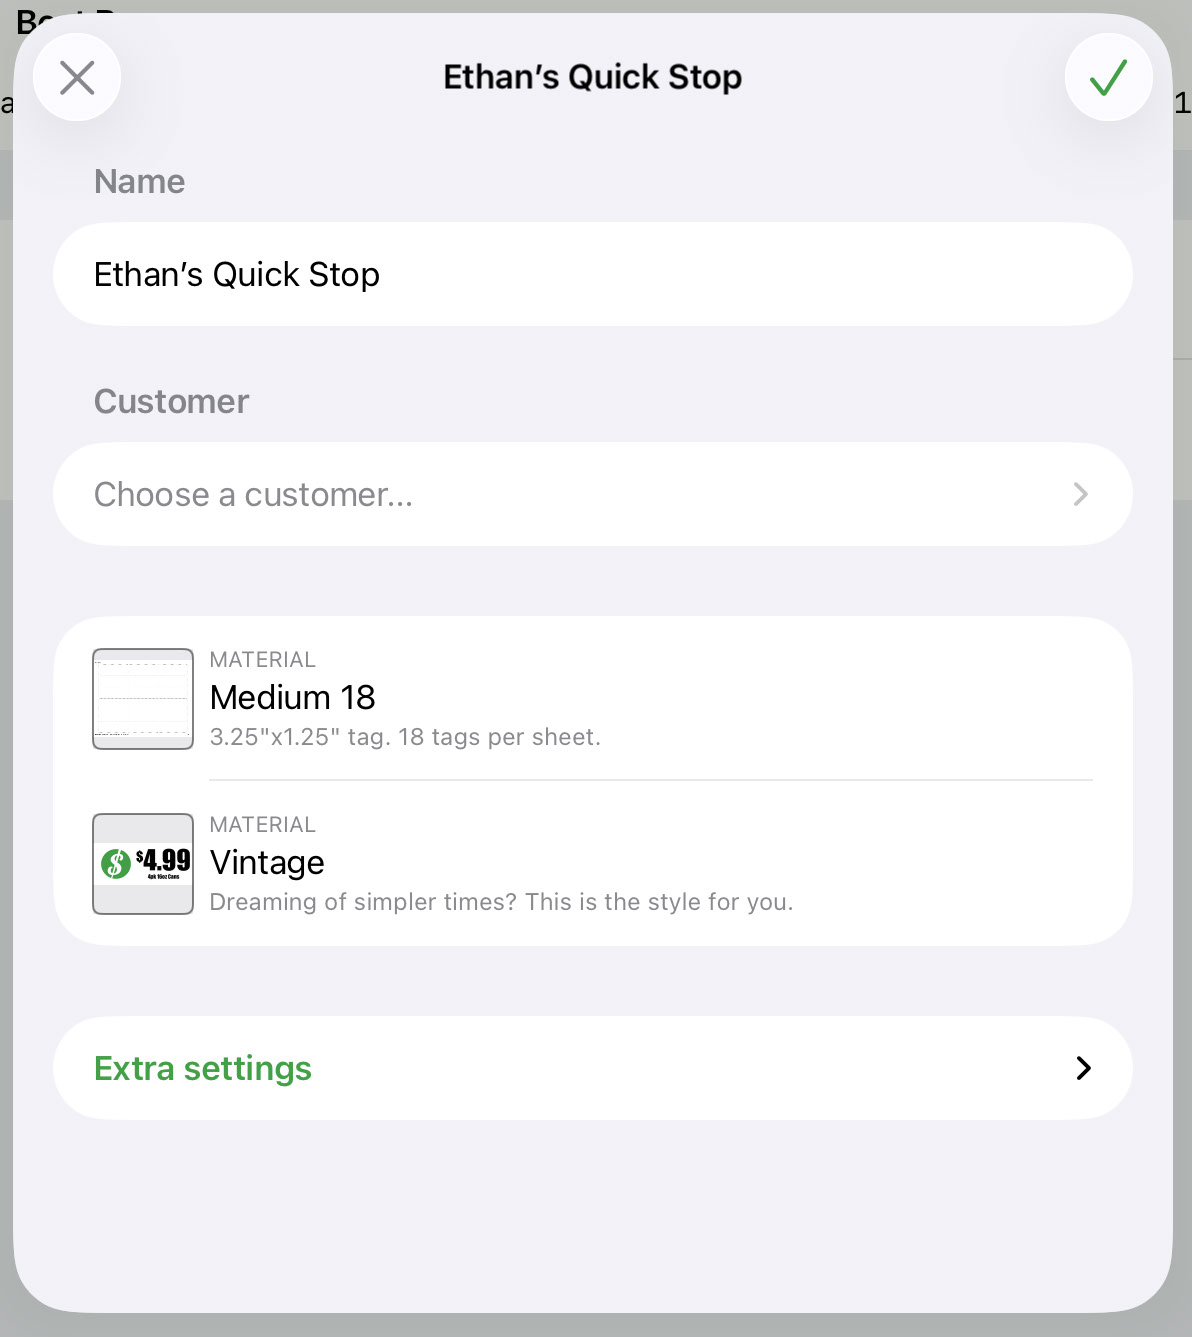
Name
The project name. This will typically show up on the bottom of any printed pages.
Customer
If your company is using Customers, you'll be able to choose the customer you want attached to your project here.
Look
This is where you choose the material and style for your tag project. Material is the kind of paper your tags will be printed on while style is how your tags actually look.
Start project with
When starting a new project, there are three options:
- Empty creates a blank project.
- Brands creates a project with your most recently used brands.
- Brands & pricing creates a project with your most recently used brands and popular pricing.
Extra settings
- Notes is text you can have Tagify place at the top of all of your printed pages. This will also show up in the project email you get back as well as your admins Activity.
- Copies is the number of copies you'd like Tagify to make of each page.
- Gutter tells Tagify to add a little margin on the top and bottom of your tags.
- Sort by is how you'd like your tags sorted on each page.
Sign project settings
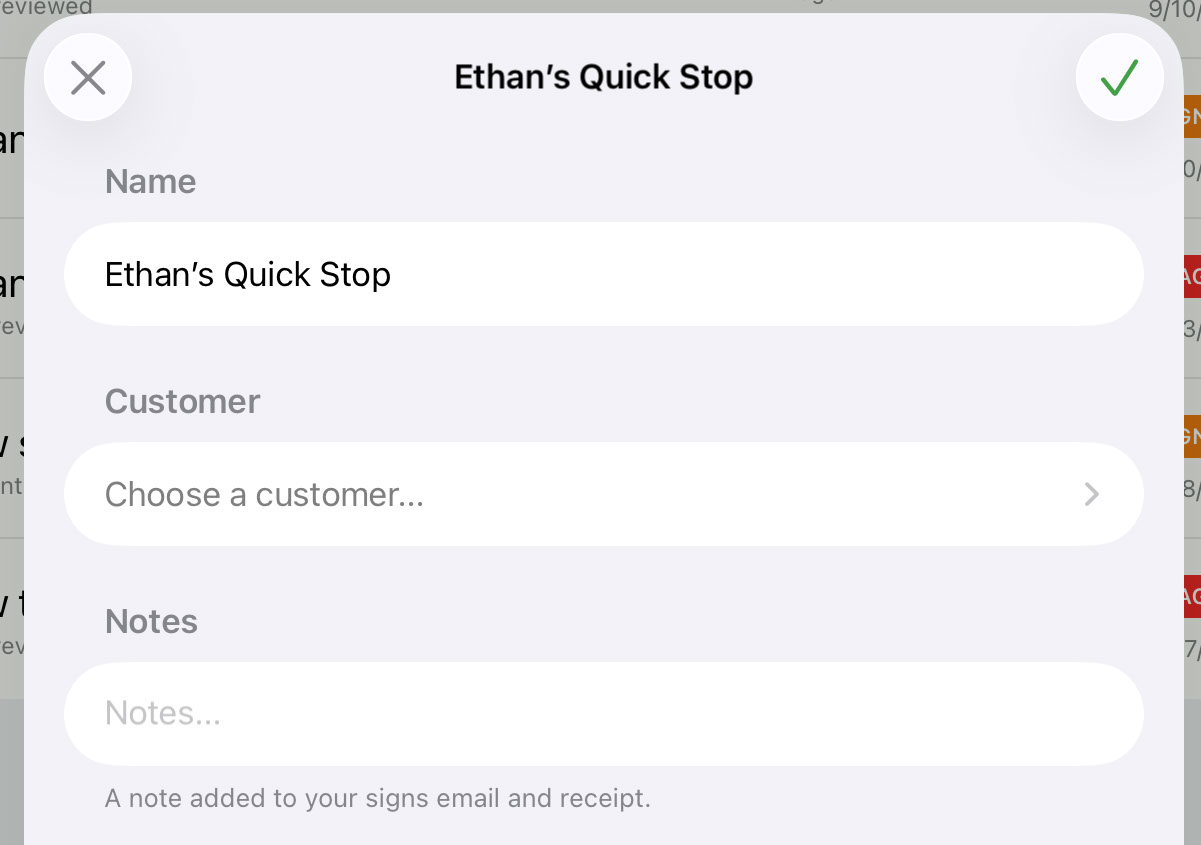
Name
The project name.
Customer
If your company is using Customers, you'll be able to choose the customer you want attached to your project here.
Notes
A small note added to the sign project email and receipt.